


Swan Canada installation guide
3D Wall Panels
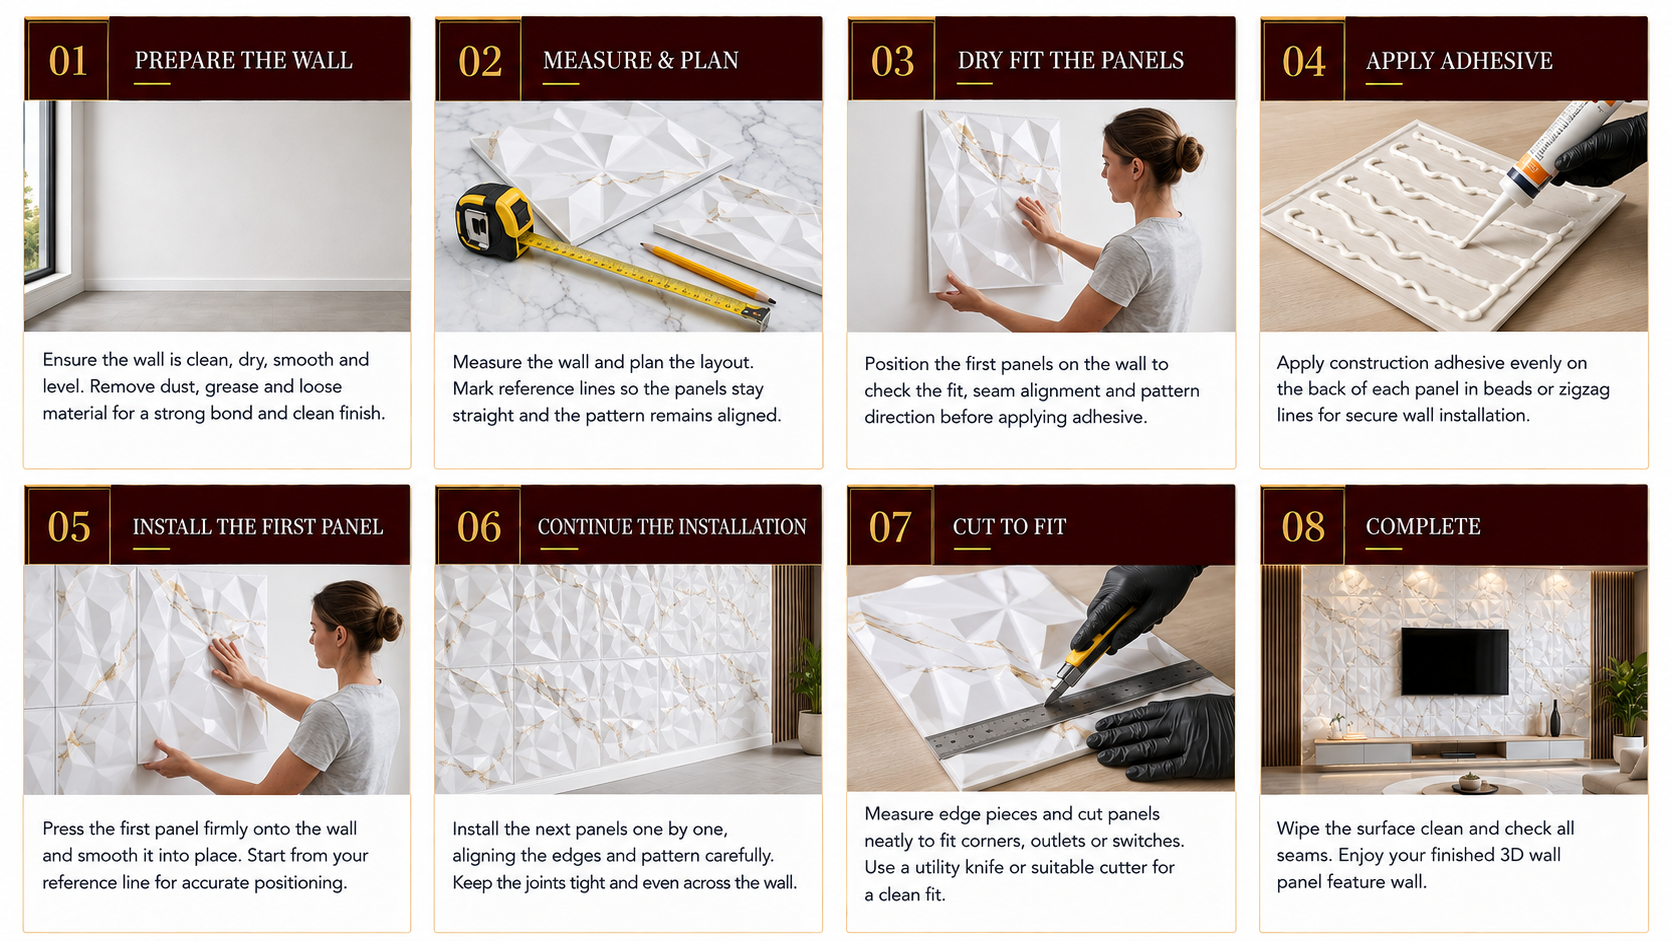
Start from a level reference line so the pattern stays consistent. Check the product material and finish before selecting adhesive, cutting tools or paint.
Tools & materials
Tape measure and level
Pencil and square
Material-appropriate cutting tool
Compatible adhesive
Caulking gun and finishing compound if required
Safety glasses and gloves
Before you begin
Fill major wall defects and remove dust, grease and loose paint. Lay several panels on the floor first to understand the pattern direction and edge alignment.
Follow these installation steps
Common questions about 3D Wall Panels
What surfaces are suitable for 3D wall panels?
Install on a clean, dry, sound and reasonably flat surface. Remove loose finishes, repair damaged drywall and test adhesion on glossy paint or other low-porosity surfaces.
Which adhesive should I use for 3D wall panels?
Use an adhesive approved for both the panel material and the wall. Apply only the recommended amount so adhesive does not squeeze into visible joints, and complete a small test area first.
How do I cut panels at the edges of the wall?
Use a sharp knife, fine saw or other tool appropriate for the panel material. Measure twice, support the panel and place cut edges where they can be covered by a corner or finishing trim when possible.
How can I make the pattern line up across panels?
Start from a level and plumb reference line, dry-layout several panels and identify the repeating pattern before fixing the first piece. Check alignment after every row rather than correcting it at the end.
Can the joints be filled and painted?
Some 3D panels can be filled, primed and painted, while others are intended to keep a visible joint. Follow the instructions for the exact panel and test filler, primer and paint on an offcut.
Can 3D wall panels be used in damp rooms?
Use them only in locations allowed for the selected material. Control moisture and ventilation, seal edges where specified and do not treat decorative panels as a substitute for waterproofing.
Should I begin in the centre or at one corner?
Choose the start point based on the focal wall and the size of the end cuts. Centring the pattern often creates balanced edges, while a corner start may reduce cutting. Dry-fit the full layout before deciding.
Can the panels be removed later?
Removal depends on the adhesive and substrate and may damage paint or drywall paper. Use a fastening approach suited to the desired permanence and test a removable method before covering the wall.


